Bootstrap Checkbox Design
Introduction
In some cases the elementary things might probably get very vital-- specifically the moment you get to need them. For instance how do your site visitors connect with the web pages you make stating a simple Boolean action-- just yes or no concerning a number of the issues you require to ask, the way they do consent to the terms or line up a few of the attainable preferences they might have. We in most cases get past this without paying much of an recognition to the feature responsible for these sorts of actions however the Bootstrap Checkbox Toggle is actually a pretty important component-- one our forms can't in fact perform without.
Within the most recent fourth edition of the Bootstrap framework we are presented with the
.form-check.form-check-label<div>.form-check.form-check-label<label><input>.form-check-inputThe ways to work with the Bootstrap checkbox:
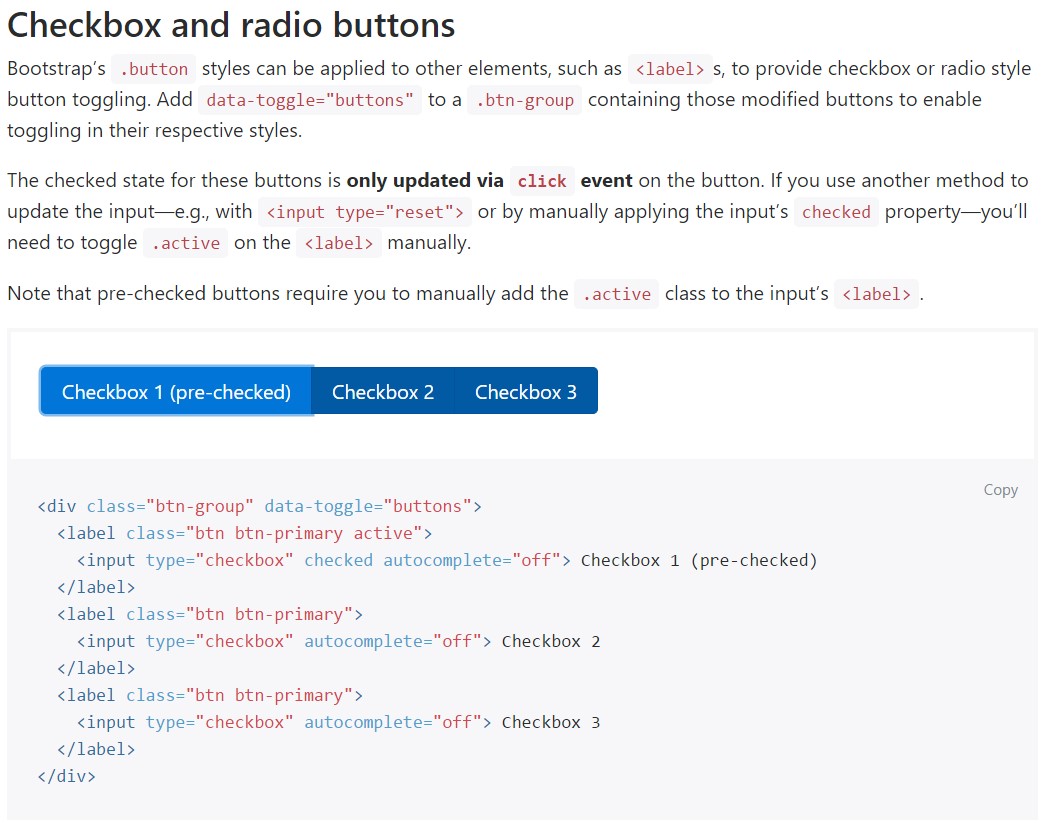
The checked state for these buttons is only updated via click event on the button.

<div class="btn-group" data-toggle="buttons">
  <label class="btn btn-primary active">
    <input type="checkbox" checked autocomplete="off"> Checkbox 1 (pre-checked)
  </label>
  <label class="btn btn-primary">
    <input type="checkbox" autocomplete="off"> Checkbox 2
  </label>
  <label class="btn btn-primary">
    <input type="checkbox" autocomplete="off"> Checkbox 3
  </label>
</div>
Once in a while we want the checkboxes to be within our forms without the customer really being able to take some activity clicking them-- that is definitely where exactly the disabled option arrives in.
To disable correctly a checkbox in Bootstrap 4 utilizing the common HTML attribute
disabledIf you really like the tip and clearly desire to accomplish this you really should appoint the
.disabled.form-checkOne other scenario
When employing checkboxes, wrap all of them in a
<label>.custom-control.custom-checkboxApply
.custom-control-input<input>In addition apply two
<span>.custom-control-indicator.custom-control-description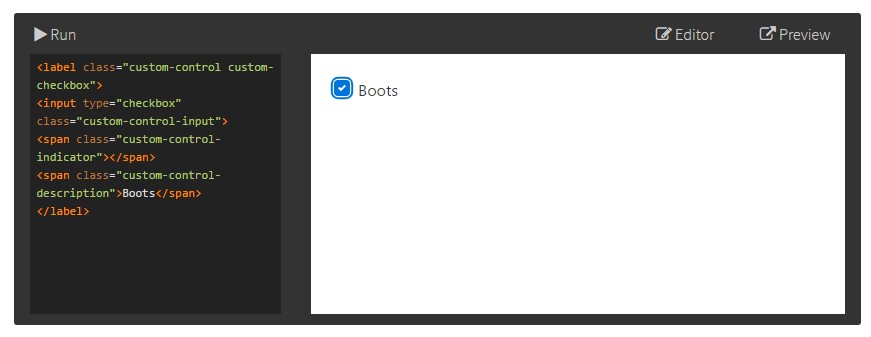
<label class="custom-control custom-checkbox">
<input type="checkbox" class="custom-control-input">
<span class="custom-control-indicator"></span>
<span class="custom-control-description">Boots</span>
</label>
Bootstrap Checkbox Class forms
Default radios and checkboxes are enhanced upon with the help of
.form-checkDisabled checkboxes and radios are maintained, still, to deliver a
not-allowed<label>.disabled.form-checkA new feature for the Bootstrap edition 4 framework is the launch of the so called customized form elements. These are the very same components we are knowing within capability though styled a lot more beautiful and with the Bootstrap means. Utilizing them you can surely provide special excitement and individuality to your content by simply just selecting a few extra classes to the commands you incorporate in your forms.
If you want to use custom made checkboxes wrap them inside a
<label>.custom-control.custom-checkbox<input>.custom-control-input<span>.custom-control-indicator.custom-control-descriptionConclusions
That's mostly everything you should do in order to set a checkbox feature inside your Bootstrap 4 powered web site and put in some customized flavor to it adding it a fantastic looks. And now all you have to do is repeat the practice before you've reviewed all of the checkboxes required are already on the web page.
Inspect a few on-line video training regarding Bootstrap checkbox
Connected topics:
Bootstrap checkbox main information
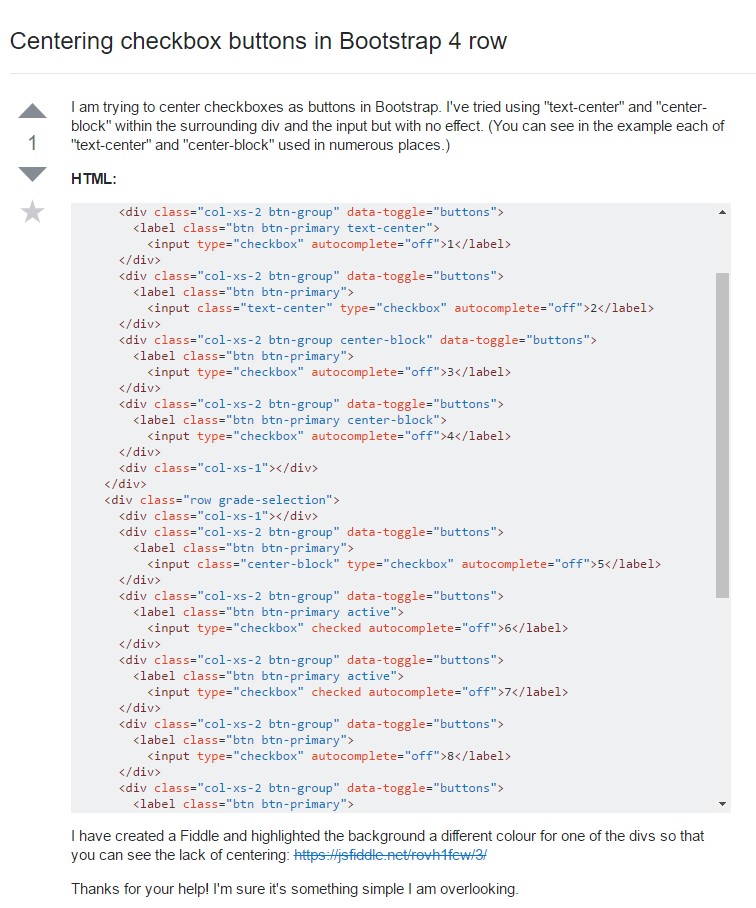
Centering checkbox buttons in Bootstrap 4 row
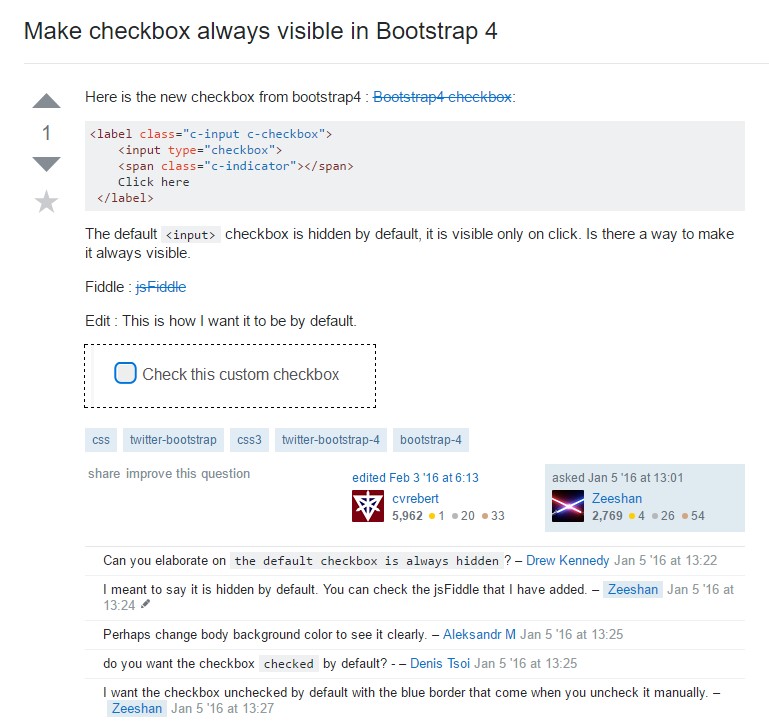
Make checkbox always visible in Bootstrap 4